Registering users with your no-code backend REST API
In this section, we'll look at the sign up page for the sample app.

Go to TODOLISTS service, open the Users model, switch to the Integration tab.

Copy JavaScript code from the Create tab.
Go back to sample code and open the file src/components/Account/Signup.js. Locate the function signup().
  // signup
  const signup = (e) => {

    e.preventDefault()

    if (!validate())
      return;

    setLoading(true)

    // ** INSERT USER CREATE CODE HERE **

    // ** INSERT USER CREATE CODE ENDS **
  }
Paste the JavaScript code from earlier inside the marked area.
  // signup
  const signup = (e) => {

    e.preventDefault()

    if (!validate())
      return;

    setLoading(true)

    // ** INSERT CREATE USER CODE HERE **

    fetch("[YOUR LIGHTSWITCH API ENDPOINT]", {
        headers: {
            "Content-type": "application/json"
        },
        method: "POST",
        body: JSON.stringify({
            /********** REPLACE ***********
                username: "sample string",
                password: "sample string",
                role: "sample string",
                enabled: true,
                email: "sample string"
            *******************************/
        })
    })
    .then(response => response.json())
    .then(json => {

        if (!json.success)
            throw new Error(json.message)

        /****** HANDLE RESPONSE ********
        console.log(json.data.id)
        *******************************/

    })
    .catch((error) => {

        // handle error
        alert(error.message)

    })

    // ** INSERT CREATE USER CODE ENDS **
  }
Next, we will replace the body of the request to include user input values.
    body: JSON.stringify({
        username: username,
        password: password,
        email: email,
        firstName: firstName,
        lastName: lastName
      })
Add code to handle the response. Here we will be saving the authorization token returned from the API.
    .then(json => {

        // ***** UPDATED ***** //
        setLoading(false)

        if (!json.success)
            throw new Error(json.message)

        // ***** UPDATED ***** //
        auth.setToken(json.data.token)
        navigate(from)

    })
The final output should look something like this.
    // signup
    const signup = (e) => {

    e.preventDefault()

    if (!validate())
    return;

    setLoading(true)

    // ** INSERT CREATE USER CODE HERE **

    fetch("[YOUR LIGHTSWITCH API ENDPOINT]", {
    headers: {
    "Content-type": "application/json"
    },
    method: "POST",
    // ***** UPDATED ***** //
    // include all user inputs
    body: JSON.stringify({
    username: username,
    password: password,
    email: email,
    firstName: firstName,
    lastName: lastName
    })
    })
    .then(response => response.json())
    .then(json => {

    // ***** UPDATED ***** //
    // indicate that the action is complete
    setLoading(false)

    if (!json.success){
    throw new Error(json.message)
    }

    // ***** UPDATED ***** //
    // save token and move to previous location
    auth.setToken(json.data.token)
    navigate(from)

    })
    .catch((error) => {

    // ***** UPDATED ***** //
    // indicate that the action is complete
    setLoading(false)

    // handle error
    alert(error.message)

    })

    // ** INSERT CREATE USER CODE ENDS **
    }
Save your code and go to the app. Log out if you're already logged in and click Sign up.

Create a test user.

- Username
- Password (password requirements also apply, see below.)
- At least one uppercase letter
- At least one lowercase letter
- At least one number
- At least one special character
- Altogether, at least 8 characters long
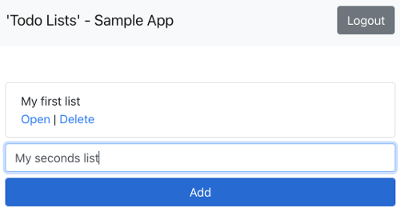
Once your new user account is registered, you'll be directed to Lists.
Notice that there are no lists; this is because Standard Application Users only have access to their own data, so anything you created previously as a Data Administrator would not show up here.

Now you can create lists and tasks within the new user account.